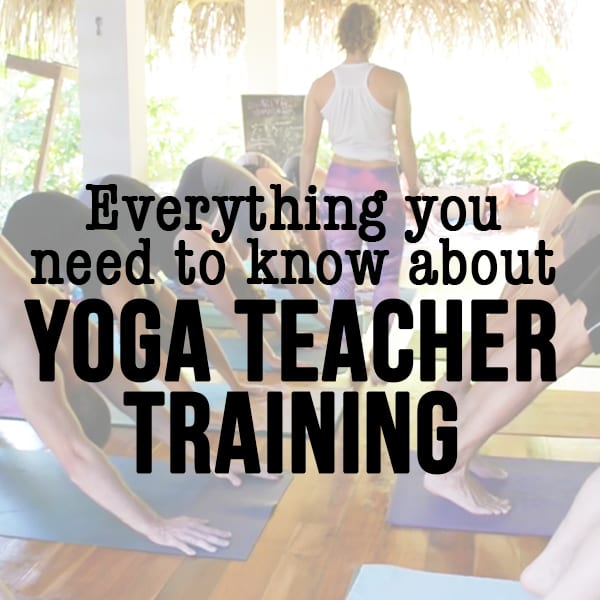
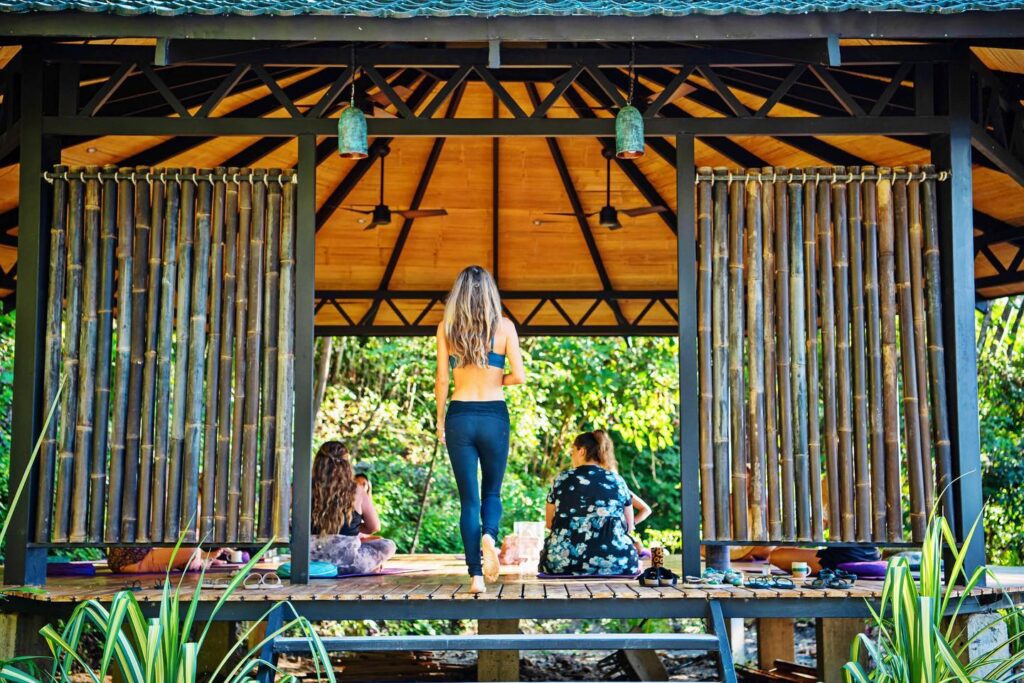
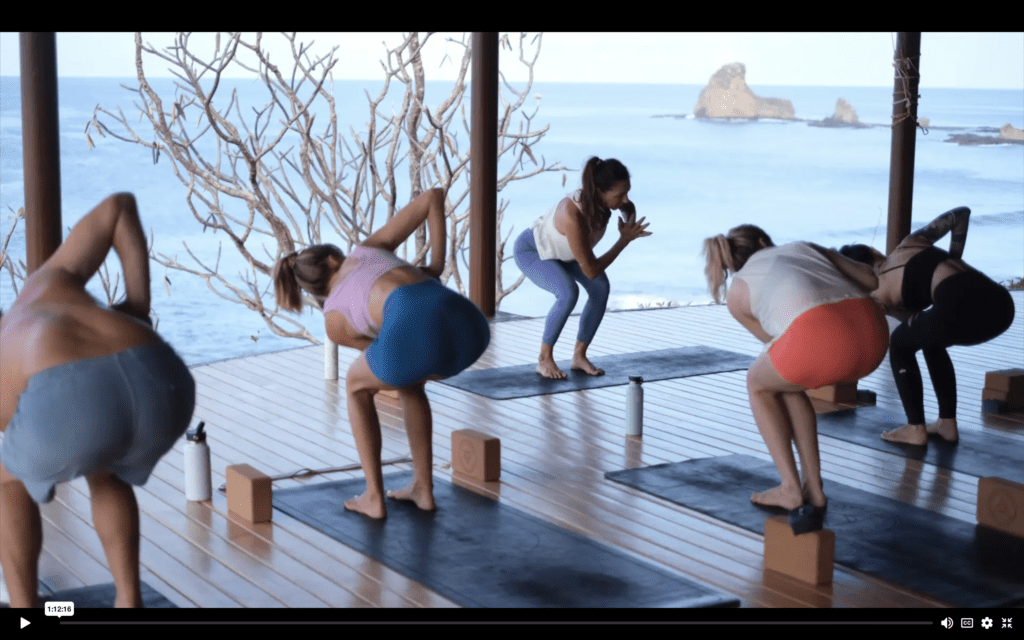
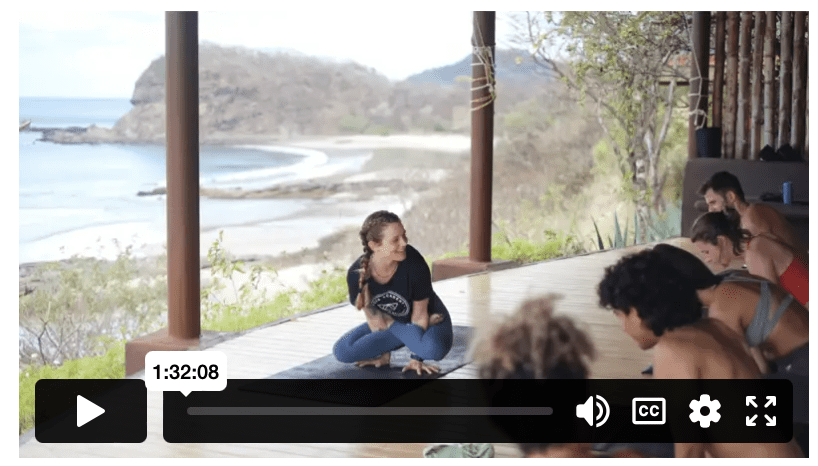
Week 1 of our 200hr yoga teacher training – June 2017

We are already one week into this summer’s 200hr yoga teacher training in Santa Teresa, Costa Rica. At Yoga Academy International, we are raising the standard of education of yoga teacher training. We’re committed to providing our students with the best yoga teacher training out there!

We start our days with morning flow and beach meditation. What better place to do so than here in paradise? Our students learn yoga and alignment theory, along with practice teaching sessions, workshops and communication skills. We wrap up the day with uplifting evening satsang. Our students are working hard and get to indulge in well-deserved, nourishing meals throughout our intensive training. Still, we always make sure there is enough time to enjoy the beach!

Check out what’s been going down, and we are just getting started!


[fblike]

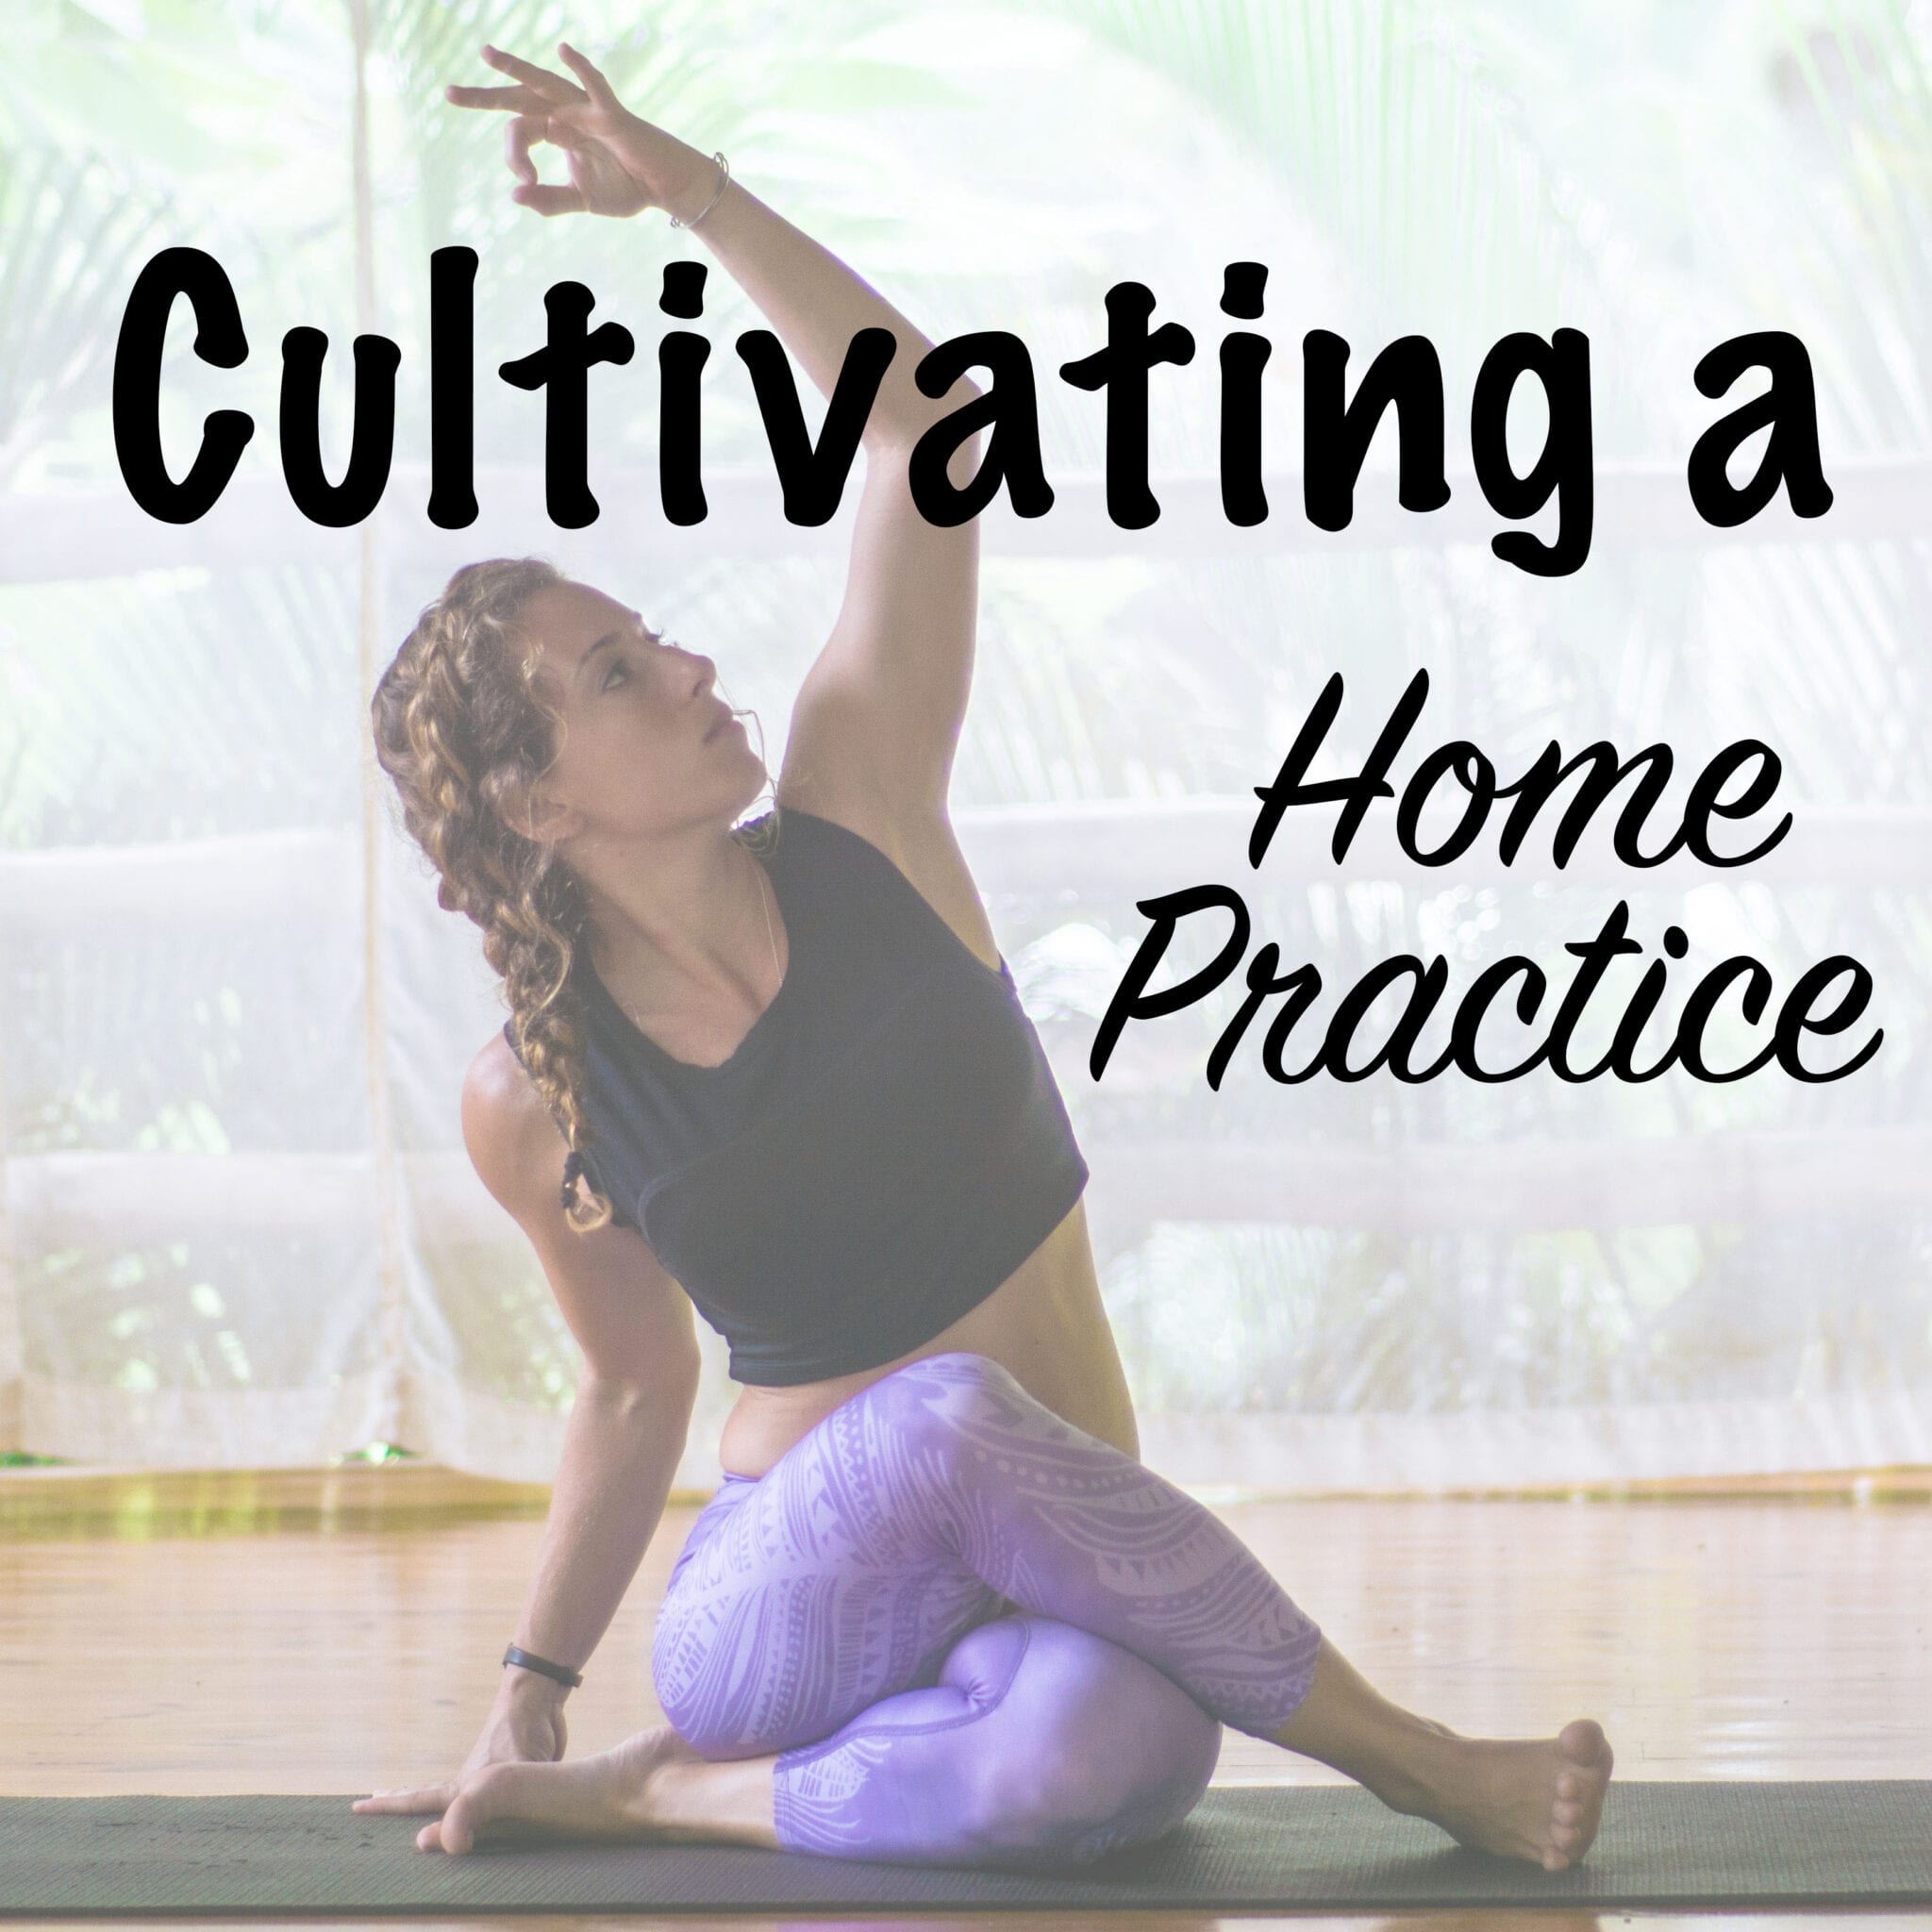
Cultivating a Home Practice in 4 Easy Steps


Say the word “yoga” in conversation, and you tend to evoke imagery of lycra-clad (or barely-clad) stretch-fanatics, moving and flowing in a spacious, airy studio that smells distinctly of essential oils. The yoga industry caters to an ever-growing crowd of over 37 million North Americans, many of whom were introduced to yoga in a studio setting, or via group classes at a local fitness facility. Enrolling in group classes at a studio, gym, or communal facility is an amazing way to not only further delve into your practice, but also to integrate yourself within a pocket of your local community. Layer in the guidance and knowledge of an educated teacher, and an element of surprise and personal non-attachment when it comes to creating the sequence to guide classes, and you’ve got an ideal environment to grow your yoga practice. Eventually, however, you may find yourself noticing that some days, your body is calling out for something different than the sequence is built upon. And some days, the idea of being alone with your mat instead of surrounded by others, will resonate with you. As these “some days” meld into “many days,” you may find yourself contemplating alternatives to the seemingly traditional studio practice setting and begin your own home practice.

So…where to next?

Cassandra Cooper Home Practice

Getting back to yogic roots

Although we frequently associate yoga with group practice, look back on traditional texts (e.g. Hatha Pradipika, Chapter 1, Verse 12) and you will discover that Hatha yoga (the most commonly-practiced form of yoga in North America, which encompasses a variety of asana-based practice types) was originally meant to be practiced in solitude:

“The hatha yogi should live alone in a hermitage and practise in a place the length of a boy (one and a half metres), where there is no hazard from rocks, fire, or water, and which is in a well-administered and virtuous kingdom (nation or town) where good alms can be easily attained.”

Now, let’s bear in mind the fact that this text came to fruition during a time when a yogi’s life was divided into four stages, or ashrama, three of which were characterized by significant lack of social interaction and solitude.

As we’ve evolved, so has the setting and style of our personal practice. I’m not one to endorse only practicing in a confined space on a mud-ground with no views of the outside world (but hey, if that’s your jam, go for it!) Approach the development of your personal practice with yogic principle; slowly, mindfully, and with an intention to be open as you adapt and grow.


1. Create a space

I used to be one of the classic eye-rolling non-believers when it came to understanding the importance of setting intentions and allowing time to create an energetic space in which to conduct your practice. New-agey? Perhaps. Valid? For me, definitely. For you, maybe not, but before you quickly skip to the more concrete and tangible instructions below, give this a shot.

Establish a spot to practice that doesn’t stress you out. We tend to associate physical locations with memories or habits of repeated actions, so try and find a space that speaks to you in a soothing, calm voice as opposed to one that screeches in high-pitch. Add in what you need to make yourself feel at ease; essential oils, incense, props, music. Make this space your own, customize it for what you need in that moment to help cultivate sukham and feel at ease.


2. Build a foundation

Taking ownership over your practice is an empowering but also overwhelming step in the always-continuous yogic journey. Keep the steps manageable by developing a framework upon which you add, subtract, and modify as you become more comfortable guiding your home practice.

  • Start with a short meditation, five minutes is plenty to start. Scan your physical body, notice what feelings come up, and take time to establish the link between your moving parts and your moving mind.
  • Move on to breath work (pranayama). In a traditional yoga practice, pranayama is its own dedicated practice, and can take upwards of 30 minutes. Bear in mind that breath work is difficult, and if done incorrectly or without awareness can cause harm to your body. For that reason, start by simply working to lengthen your inhales and exhales, focusing on breathing into specific parts of your body where you’d like to create a sense of softness or spaciousness. As you become increasingly comfortable with breath work, begin to research and incorporate different techniques. My suggestion is to journal afterwards, and identify which techniques resonate with you, and the mental and physical responses that are generated as a result.
  • Work on joint mobility next. Bring some movement into the main joints (neck/shoulders, wrists, elbows, hips, knees, ankles), and spend extra time exploring areas that feel as though they need more acute attention at that point in time. Experiment with new ranges of motion, load bearing and non-load bearing exercises, and gradually incorporate greater complexity into your joint warm-ups.
  • Build heat. Begin to incorporate more activity and movement into your practice. Traditional yoga methodology will tell you to launch into sun salutations, vinyasas, etc. These are great options, but they’re not the only ones. Long holds in strength-building postures such as Ashta Chandrasana (high crescent lunge), or dynamic squats can build heat equally as effectively as faster-paced flows. Experiment and ensure that you balance right to left side with respect to sequencing and breath hold times.
  • Challenge balance. After cultivating strength and heat, work on understanding the balance between the physical stability and your inner balance. Base your foundation in simplicity, and eventually move towards more complex, balance-oriented asanas or movement patters.
  • Cool down. This portion of your self-practice can mean so many different things, depending primarily on the selected theme of focus the active portion of your practice. Try to counterbalance whichever parts of your body were recruited, and give them an opportunity to soak in breath and a bit of extra length and space. Use the cool down as an opportunity to begin reconnecting with how you’re feeling, what’s changed, what hasn’t, and any thoughts that arose during the process.
  • Choose a closing shape for your practice. Seated, side-lying, prone, or in good old fashioned savasana. Before you come into whatever final shape you choose, take a few moments to ask your body what it wants. This is an opportunity to open a dialogue and further distance yourself from taking the general “autopilot” option.


3. State your focus

I’m a big proponent of focusing your practice around a theme, as was alluded to in the second section here. Working with an anatomical, spiritual, seasonal, or energetic point of focus on which to build and structure your practice brings an element of cohesiveness onto your mat, and provides you with an opportunity to better understand how your self-practice is an opportunity for holistic connection.

Allow your focus to fluctuate with your mood, your situation, and anything else that you feel makes sense for you in that time frame. Journaling and documenting your sequence is a very cool way to look back on how your practice evolves, and remind yourself of aspects that worked well, and also those things you tried that might not have had the intended effect.


4. Leave a little wiggle room

As your self-practice evolves, you may find yourself working towards apex asanas, and more complex

movements. There may come a period of time when you start to set a more rigid routine and structure around your self-practice; this is not necessarily a detracting factor, stability to ensure growth can be extremely beneficial. That being said, always come back to your initial intention for nurturing a self-practice (hint: the word SELF). Always allow your practice to be what you need in that moment, try to let go of expectations and preconceived notions around what your sequence needs to look like, and what poses or movements you need to focus in on. Some days, your self-practice sequence is going to be a 45 minute savasana or body scan. And that’s okay. Allow yourself to accept that elusive quality, and use it as an opportunity to develop a better relationship with yourself. Enjoy the journey that this practice let’s you embark upon, and try to see even the most frustrating of obstacles as chances to seek new routes of ascension along the path.


Cassandra Cooper

Cassandra Cooper

Growing up with a background in competitive figure skating, Cass’ journey with yoga began at a young age. What started as a way of maintaining flexibility and mobility has since shifted to focus on building strength, by combining elements of functional movement into her practice and sequencing, helping to explore the different ways in which each individual’s body moves and changes shape. Since completing Octopus Garden’s 200 hour teacher training, and Rishikesh Yog Peeth’s 300 hour advanced teacher training program, Cass has pursued Barre and Pilates certifications through Stott Pilates, along with Essentrics movement training. The most important thing she’s discovered along the way is that you’re always a student – be curious, always question, carefully analyze, and continuously seek new avenues towards unexpected answers. ‘Yoga is the journey from cosmetic to cosmic beauty.’

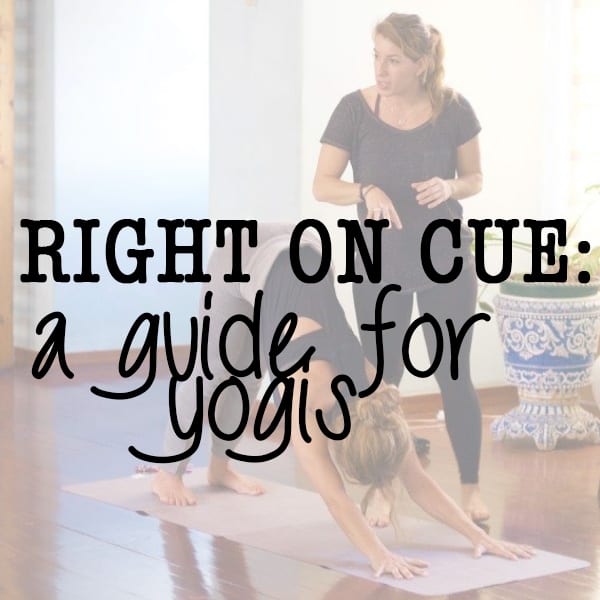
Right on Cue: A Guide for Yogis

Bring back curiosity and mindfulness into your practice, leading a class is more than just being right on cue. 

As intelligent, evolved beings we often find it challenging to take directions from others. Think back to the childhood curiosity that frequently found you pushing beyond the neatly laid out boundaries set out for you by parents and elders, questioning everything. If you spend long periods of time with young children in your day-to-day, you’re probably quite used to hearing the word “why?” endlessly repeated in response to basically any statement.

At some point in our lives, generally around the same time we found ourselves confined to a chair and desk for six hours a day, we started to lose that incessant desire to question; to explore beyond the surface of directions sent our way by others. We started to find it much easier to take directions without asking, and go through the motions on an autopilot of sorts.

In our modern yoga and movement practice, this lack of childlike curiosity and autonomy over our physical, mental, and emotional responses to our practice has become a (not-so) silent epidemic.

Right on Cue

Drastic words? Perhaps, but I fully believe that the consequences hold some pretty serious implications and impact. Let me back track by saying that I do not think this falls entirely on yoga practitioners unwilling to ownership of their practice, but also on the part of teachers who continue to repeat generalized cues without much conviction or thought put into how they translate into the bodies of practitioners in the room at that moment in time. And it’s this continuous stream of bland, non-personal cues for both the physical and subtle body that lead to practitioners tuning out, running on autopilot, and failing to connect on a profound level with what’s happening through their practice. As a growing community that has embraced the concept and practice of yoga, it’s time to tune back in to both our teaching and practice, and bring back that act of self-aware questioning.


Yoga Teachers

Let’s start by breaking down the difference between teaching and instructing, because they’re two very separate vocations. To instruct is to go through the motions, repeating words and phrases that are far too often not truly our own. An instructor leads with few modifications, and provides cues that do not allow much, if any, wiggle room, without questioning why he or she is asking practitioners to progress through a sequence of movements. A teacher, however, dedicates him or herself to moving outside his or her own definition of the practice in order to better serve the practitioners in the room, at any given time. A true teacher never defines him or herself as such (re: Yeah, actually I’m a yoga teacher. It’s pretty great!), but rather as a vehicle for learning.

The best teachers always question “why,” guide with purpose, and are always students themselves.

So “teachers,” let’s make waves and make changes. Instead of providing alignment cues in a tone that suggests everyone must follow suit, it’s important to provide practitioners with the space to experiment. Encourage everyone to feel out how their body responds to certain movements, to breath pattern, and even to different verbalizations and visual representations of instructions. Heel to heel vs. heel to arch vs. square your hips vs. toes at a 45 degree angle – there is no one or even two or three “right ways” for asana to make its appearance across a vast spectrum of different physical bodies. Let each practitioner determine what works and what doesn’t, and start to find your own voice in how you choose to verbalize your points of guidance.

Right on Cue

The best piece of advice I have been given was by a friend during our 300 hour training in Rishikesh. She observed me teaching our final “practicum” class, and when I looked to her for feedback, she told me that the best parts of my class were when I was being my authentic self. She suggested to me that I forget about turning to those overused, tired cues that we hear teachers repeating with a tireless lack of conviction. Be a little awkward, try to crack a joke or two, if that’s how you best connect and communicate with others. Even those practitioners that are new to your classes and teaching style will better connect with a teacher who carries with him or herself a sense of credibility and confidence, and doesn’t force a falsified presence. Finding your voice, as non-traditional as it may be, is so key to feeling fully comfortable as you strive to enable others to feel comfortable and find themselves through their practice.


Yoga Practitioners

Continue to ask “why.” This doesn’t mean that every single cue provided to you by an instructor or teacher needs to be followed up with that verbalization, but question the purpose behind the pose, behind the movement, and behind the cue. Leverage this to build a sense of awareness within your own physical and subtle body – identify how your reactions and responses change each day, and start to foster a deeper level of self-awareness. It’s incredible easy to move through asanas and through your typical flow without fully absorbing each subcomponent within your own being. Avoid the autopilot trap, bring a sense of awareness into your practice, and let that attunement permeate throughout other aspects of your life.

In its most raw form, pre-Instagram yoga challenges, before “Hot Power Flow” classes and “Yoga Bootcamp” classes were ever a thing, yoga symbolized union. It is the understanding that we are all one and the same. Yoga embodies the fact that nothing separates each one of us here; we do not coexist, we only exist as one collective. So let’s take steps towards breaking down the dogmatic teacher-student barriers that have come to be, and provide practitioners with the ownership to shape their respective practices, both on and off the mat.


Cassandra Cooper

Cassandra Cooper

Growing up with a background in competitive figure skating, Cass’ journey with yoga began at a young age. What started as a way of maintaining flexibility and mobility has since shifted to focus on building strength, by combining elements of functional movement into her practice and sequencing, helping to explore the different ways in which each individual’s body moves and changes shape. Since completing Octopus Garden’s 200 hour teacher training, and Rishikesh Yog Peeth’s 300 hour advanced teacher training program, Cass has pursued Barre and Pilates certifications through Stott Pilates, along with Essentrics movement training. The most important thing she’s discovered along the way is that you’re always a student – be curious, always question, carefully analyze, and continuously seek new avenues towards unexpected answers. ‘Yoga is the journey from cosmetic to cosmic beauty.’

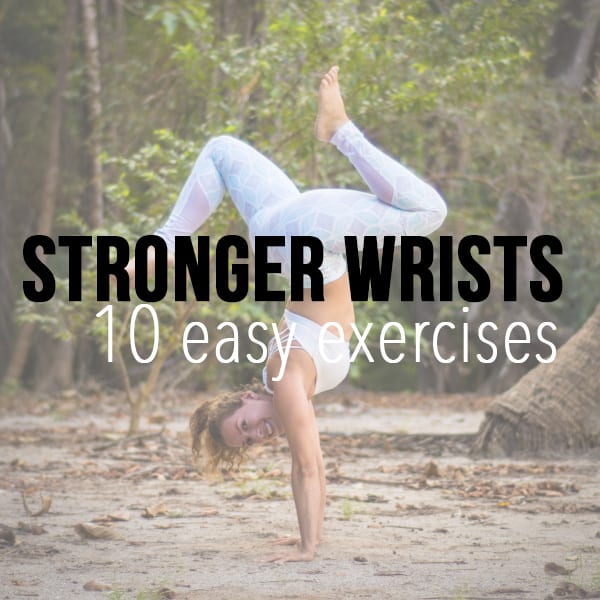
Stronger Wrists: 10 Easy Exercises

There’s a reason that the statement “getting down on hands and knees” is synonymous with doing all of the hard things. As with most clichéd statements, the words themselves may be overused, but their validity rings true. I’d make a joke about having a nickel for every time I saw a student come down and shake out his or her wrists mid-downward dog, but I think it’s time to lay to bed the literary devices (for now).

As a mammalian group that has evolved to carry out the majority of our lives on two feet as opposed to quadruped, the struggle gets very real when we are tasked with bearing significant load on the wrists. The struggle is further amplified when said wrist joints are supporting weight at a degree of flexion or extension that they so rarely get exposed to from our tech-absorbed lifestyles (re: texting, typing, and any other social media-induced sinning you can think of). The solution to the tenderness or lack of strength you may be feeling is not to simply keep pushing through chaturanga after chaturanga, letting your wrist weakness translate its way up into pinching scapula and over-extension of the lumbar spine. Scale back, and start with a basic wrist warm-up routine that you can build up over time to help develop both the strength and mobility you need to keep this integral synovial joint happy and healthy. Keep in mind that none of these exercises are revolutionary or unique (trademark anyone?), but serve to introduce a less familiar range of motion back into the joint, coupled with dynamic movement. Here are 10 easy exercises for stronger wrists.

. . . . . . . . . .

1) Table-top Dynamic Palm Presses

stronger wrists

Start by positioning yourself on hands and knees; knees under your hips, and with wrists under shoulders. Wrists will not line up right underneath your shoulders, as you will have to allow for the carrying angle of the elbow, so you will notice slight ulnar deviation (fingers moving away from midline). Wrist creases will move towards parallel with the top of the mat. Spread all ten fingers wide, maintain a gentle curve through the joints of the fingers, and distribute your weight evenly by pressing in through the base of your palm (meaty party), as well as the pads of your fingers. Start moving back and forth, use your inhalations to take your hips towards your forearms, and your sitting bones back towards your heels. Make sure you’re not dropping your navel towards your mat; front line of your body remains engaged, but not tense. You can switch it up and move side to side, just be sure to keep the fingers spread wide, and the shoulder blades moving in opposite directions to avoid any pinching of the scapula.


2) Table-top Dynamic Wrist Extensions (Variation A)

stronger wrists

Take the same starting position as 1). Turn your fingers out to opposite edges of your mat (thumbs forward, pinky fingers back). Move hips forwards and then sit weight back towards heels, keeping all ten fingers pressing in to the mat. Play with changing the weight distribution through your palms, and move through 10-20 iterations of this.


3) Table-top Dynamic Wrist Extensions (Variation B)

Take the same starting position as 2). Instead of moving the trunk and hips, lift one palm, suction cupping the palm diaphragm up away from your mat, and then place it back down. Repeat on other side, and feel free to lean weight slightly toward each side as your lift the palm. Repeat 10-20 times per side.

stronger wrists stronger wrists


4) Table-top Reverse Wrist Extensions with Pulsing

stronger wrists

Users’ warning: this is intense, especially for those of us restricted to a stereotypical office job where we spend the vast majority of our time typing, in wrist flexion. Take palms onto the mat, but spin wrist creases to face towards the front edge of your mat, fingers point directly back toward your knees. Walk your knees up to meet your finger tips to take some pressure and weight off of your wrists, and start to slowly bend your elbows slightly, taking your glutes back toward your heels, and lifting the palms away from the ground. If this is super intense, try a single palm variation, with one wrist crease exposed to the front of your mat, and one wrist crease facing back in toward your knee. Keep this exercises dynamic by pulsing the palms up and down 5-10 times, and on your last pulse, see if you’re able to peel the palm slightly higher, and hold for 3-5 rounds of breath.


5) Moving combo (2-4)

Stay in table-top, and move through the different wrist positions explored in the first four exercises, using your inhales to guide weight forwards, and your exhales to bring your glutes closer towards your heels. This requires some coordination, but is a dynamic way to work mobility through the wrist joint and challenge your breath-body connection.


6) Table-top, “Awkward” Push-ups

Stay in table-top, this time reverse the direction of your fingers from 2) and 3), so that your elbows point out, thumbs come toward your knees, and pinky fingers point forward. Keeping your shoulder blades spreading apart, upper back strong, inhale, then exhale to bend at your elbows in an “awkward” push-up variation, and press back up to straight arms on the inhale. Make sure your core braces to prevent your chest from collapsing down, and keep your neck in line with your spine. Repeat this 10-15 times.

stronger wrists stronger wrists stronger wrists


7) Table-top Finger-Curls with Wrist Flexion

Now we’re getting to the good stuff! Maintaining table-top position, flip onto the backs of your palms (yes, that’s right. No, I’m not crazy, and yes, this is going to feel weird). Wrist creases will face out toward the left and right side of your mat, with your fingers spread wide apart and facing in towards one another. The soft, fleshy part of your palms (diaphragm), will face up towards your nose. Take an inhale to spread the fingers as wide as you can, and then exhale to curl the fingers into fists, squeezing. Repeat this 5-10 times, without compensating or taking tension in through your neck and shoulders.

stronger wrists stronger wrists


8) Table-top Dynamic/Sustained Wrist Flexion

stronger wrists

Same starting position (backs of palms) as 7). Take your wrist creases to face towards the front edge of your mat, and try to press as much of the back of your hand into the mat as you can. Hold here. Keep your elbows from bending, and spread your fingers far apart. You can play with spreading the fingers wide, and then squeezing them back together, in a snow-angel motion, to change the sensation through the wrist and back of your palms.


9) Isolated Finger Taps

Quadruped starting position, spread all ten fingers wide. Keep elbows from bending, and start to tap just the thumb on both left and right hands. Take 20 taps, then move to index finger. Move through all five fingers on each hand. You’ll find this gets significantly tougher when you move to the middle, ring, and pinky fingers due to the structure and attachment of the tendons in your hands.


10) Non-load Bearing Flexion/Extension of Wrists

Sit in kneeling, or any comfortable seated position. LiFt elbows to shoulder height. Inhale here, on exhale squeeze hands into fists, knuckles face towards center of room, inhale to release your hands open, extending the wrists and flexing fingers back in towards your face. Repeat 5-10 times. Move slowly, squeeze a little more tightly each time you take fists, and spread all ten fingers wide when you extend and open the palms.

. . . . . . . . . .

Pace yourself; start by spending around five minutes in total working through exercises 1) to 5) as your foundation. As you start to build stability, strength, and feel less strain or resistance, gradually add in 5) to 9), mixing and matching so that you are working in equal parts wrist extension (palm diaphragms DOWN) and wrist flexion (palm diaphragms UP). Most importantly, don’t be afraid to freestyle it. The more comfortable and confident in your wrist mobility you become, the easier you’ll find it becomes to explore modifications and creative additions to your wrist warm-up sequence that challenge your anatomical limitations. It may not be as sexy as a vinyasa or a bad-ass arm balance, but by building from the ground up, you’re developing a better understanding of your body as its own entity, and setting the foundation to move towards complex, challenging movements further down the road. So get down on your hands and knees, and work your stronger wrists.

[fblike]

Cassandra Cooper writerCASSANDRA COOPER

GROWING UP WITH A BACKGROUND IN COMPETITIVE FIGURE SKATING, CASS’ JOURNEY WITH YOGA BEGAN AT A YOUNG AGE. WHAT STARTED AS A WAY OF MAINTAINING FLEXIBILITY AND MOBILITY HAS SINCE SHIFTED TO FOCUS ON BUILDING STRENGTH, BY COMBINING ELEMENTS OF FUNCTIONAL MOVEMENT INTO HER PRACTICE AND SEQUENCING, HELPING TO EXPLORE THE DIFFERENT WAYS IN WHICH EACH INDIVIDUAL’S BODY MOVES AND CHANGES SHAPE. SINCE COMPLETING OCTOPUS GARDEN’S 200 HOUR TEACHER TRAINING, AND RISHIKESH YOG PEETH’S 300 HOUR ADVANCED TEACHER TRAINING PROGRAM, CASS HAS PURSUED BARRE AND PILATES CERTIFICATIONS THROUGH STOTT PILATES, ALONG WITH ESSENTRICS MOVEMENT TRAINING. THE MOST IMPORTANT THING SHE’S DISCOVERED ALONG THE WAY IS THAT YOU’RE ALWAYS A STUDENT – BE CURIOUS, ALWAYS QUESTION, CAREFULLY ANALYZE, AND CONTINUOUSLY SEEK NEW AVENUES TOWARDS UNEXPECTED ANSWERS. ‘YOGA IS THE JOURNEY FROM COSMETIC TO COSMIC BEAUTY.’

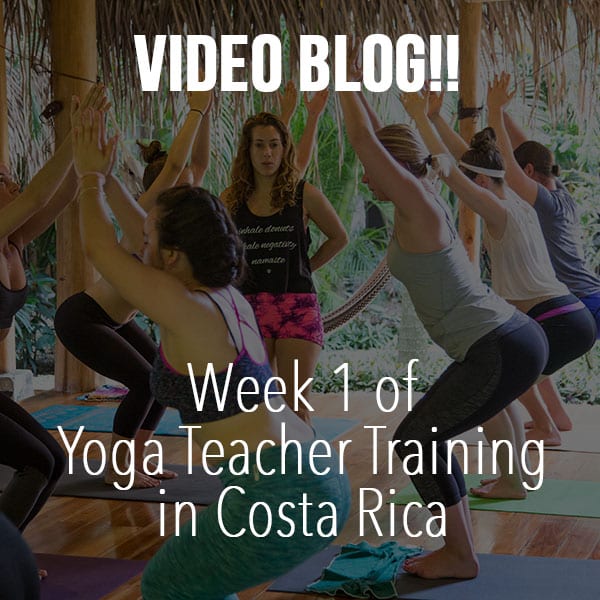
Yoga Education – How Much Is Enough?

Getting Educated – A Note from a Teacher Who Is Always in Training…

Deposit down, required readings (and suggested readings, if you’re an eager beaver) purchased, new leggings and water bottle at the ready, and you’re off to your very first day of [INSERT ESOTERIC YOGA STUDIO NAME]’s Yoga Alliance certified teacher training. Spirits high, coupled with a few expectation-fueled nerves, you take the proverbial first step on your journey towards a deeper personal practice, and possibly towards a flirtation, or even long-standing love affair with teaching.

And so marks your beautiful journey into the practice of teaching…

Or does it?

For many dedicated yoga practitioners, the bridge between student and teacher seems simple and logical – work, practice, put the #cashmoney down for a teacher training down, and undergo the metamorphosis from diligent student to devoted teacher with grace and ease. But the transition may not be quite this smooth.

The journey is on-going. After completing both Teaching Fundamentals and Advanced Teaching Yoga Alliance-certified trainings, a teaching mentorship program, a Pilates certification, and various supplemental anatomy courses coupled with weekend workshops and experiences, it’s become blatantly obvious that one “teacher training” is simply not enough. I’ve realized that the process is continuous, and with every additional course or weekend-intensive that I enroll in, I feel my perspective shift and my certainty in what I’ve been instructing and passing on to students change – and let me tell you, it’s precisely this shift that as a teacher, student, and explorer, make you re-evaluate basically everything. Scary? Yeah.

But let’s keep ourselves in check…

Cassandra Cooper Yoga Education

We live in a world that is constantly evolving, and as a result, to ensure that as a teacher and as a student you’re able to provide your students with the most informed and catered guidance possible. It’s (more) than a little bit necessary that you take it upon yourself to consistently strive for improvement and be aware of the changes that take place in the movement community around you. The moment that you become comfortable or complacent in both your practice and your teaching methods, take a quick moment to remind yourself that the path you’ve chosen to pursue extends far beyond you and your ego, and expands to envelop those all around you. And although it’s not always easy to accept fault in that which you’ve known for many years to be true in terms of alignment of an asana or a pranayama practice, it will enrich your ability to serve those around you on an on-going basis.

The (New and Experienced) Yoga Teacher’s Quick & Dirty

  1. EXPLORE – As you delve further into your yoga practice (as either an instructor or practitioner), you’ll realize that there are a number of potential avenues for you to explore. Experiment and take your time to play with and try out these various paths, and try not to take the “master of all” approach – unless you’re an anomaly, it never works.
  2. SPEED UP THEN SLOW THE F*%K DOWN – When you first venture out into the teaching world, you’ll voraciously digest any opportunity to be in front of a group that you have – which is great; this is how you gain experience. But as you become more comfortable leading others, take it upon yourself to recommit to yourself and your practice. Relax, scale back, and focus in on your own practice to nurture and grow your own creativity.
  3. INGEST, ANALYZE, and GROW – Be curious, and be willing to change your perspective. Take that weekend workshop, sign-up for that “movement” training, and above all, question what you have been taught, and don’t worry about the insecurities that may surface as a result. The moment you start accepting without challenge instructions that are passed down to you, is the moment you need to check in and assess where you stand as both a student and teacher.

And above all, remember it’s not the end result, it’s the journey. Cliched? Perhaps. Relevant? Always.

Much love,

The eternal student of this “yoga” thing – CC


[fblike]


Cassandra Cooper

Growing up with a background in competitive figure skating, Cass’ journey with yoga began at a young age. What started as a way of maintaining flexibility and mobility has since shifted to focus on building strength, by combining elements of functional movement into her practice and sequencing, helping to explore the different ways in which each individual’s body moves and changes shape. Since completing Octopus Garden’s 200 hour teacher training, and Rishikesh Yog Peeth’s 300 hour advanced teacher training program, Cass has pursued Barre and Pilates certifications through Stott Pilates, along with Essentrics movement training. The most important thing she’s discovered along the way is that you’re always a student – be curious, always question, carefully analyze, and continuously seek new avenues towards unexpected answers. ‘Yoga is the journey from cosmetic to cosmic beauty.’


200hr Yoga Teacher Training: Everything You Need to Know

Thinking about taking a 200hr yoga teacher training?

Here is a Q&A with Lauren Rudick, founder, director and Lead yoga teacher at Yoga Academy International. She addresses everything you need to know about taking a 200hr yoga teacher training!

Questions answered include what is a typical teacher training day? What if I strictly eat vegan? Is it necessary to bring my own mat? AND MORE!

Contrary to popular belief, a yoga teacher training is not only for people who aspire to teach in the future. There are many good reasons as to why one would choose to partake in this 200hr adventure. It can be to deepen your practice, learn more about yourself or just to take a break from your busy life to reconnect.

200hr yoga teacher training


Interested in taking a yoga teacher teacher training with us?

Click here for more information about our different trainings, curriculum, and how to apply.


[fblike]

5 Ways to Eat Healthy Anywhere in the World

Mikey Zaugg healthy eating

Have you tried to stay healthy while on the road? Ever feel confused about what foods you should or shouldn’t be eating? Tried googling best eating practices? The internet is wonderful. It connects people from all over and exposes us to an infinite amount of information! But sometimes it’s difficult to determine what pertains to us personally, especially when it comes to nutrition.

If you’re reading this from halfway across the country, let alone across the globe, chances are, our food options are different. It would be impossible to offer a list of the 5 best foods to eat and expect that you would have access to even 1 of them. Which got me thinking; what are some ways to eat healthy regardless of where you live or travel?


Here are 5 ways to eat healthy anywhere in the world. 


1) Hydrate.                                                                                                                               

Our bodies consist of 55-60% water, which is used for many of the body’s functions, namely digestion. The fluids produced through hydration such as saliva and stomach acid help our body absorb nutrients, kill harmful bacteria, and breakdown food. Much of our energy also comes from water and a lack of it can lead to cravings for caffeine and sugar when we feel sluggish. Often we reach for that cup of coffee because our body is signaling to us that it’s thirsty. Do it a favor and try to drink more water!


2) Limit fried foods and sugary treats.

I am not saying to avoid these all together, but there is a difference between eating a bucket of chicken wings and trying one to see what it tastes like. I encourage you to enjoy satiating foods, but a diet filled with them can wreak more havoc on your health and waistline than you’d care to know. Try a bite here and there, allow your taste buds to enjoy it fully… but then slowly back away.


3) Eat nutrient dense whole food.

This could mean any number of things, but mainly- cut the processed crap. I live in the United States. Everywhere I turn there’s “food” that doesn’t quite look like food. Bars, bags, packages with ingredient lists for days, ingredients I can’t even pronounce. Unless I am cooking, I don’t eat food that has more than 5 ingredients. Reach for foods that are as close to their natural state as you can get. Plenty of companies are now manufacturing whole food options if you just look a little harder.


Eat Healthy4) Eat local and seasonal.  You’re in a beautiful part of the world full of indigenous plants and tubers. Eating food that is in season and local offers you the chance to taste something at its peak freshness, which means optimizing its nutritional content. Indulge with fish that was caught just a few hours before, or fruits fresh off the branch. Whatever type of eater you are- herbivore or omnivore, dig into the foods that this land harvests for you. Give your senses a chance to explore your current corner of the planet, while giving your body a chance to absorb the abundant vitamins and minerals found in fresh, local food.
 

5) It’s not just WHAT you eat, it’s HOW you eat it. We live in a time where we’re completely removed from the ritual of eating. Pausing before meals to express gratitude for our food is not just some spiritual practice. Gratitude puts us into a relaxed state, which also prepares our bodies to eat. When we do eat, it’s important to take small bites and chew them fully. The simple act of making your meal time a mindful and relaxed practice could be the difference in using your food as nourishment or just using it as a pacifier to a craving.


Food is nourishment and fuel for our bodies so that we can go out and jump, play, sing, laugh, have sex, surf, write, ski, or well, just get off the couch. Food is not meant to be obsessed over and scrutinized. So, take the pressure off yourself. “Health” isn’t worth having if you’re miserable trying to attain it. Eat well and then go out there and chase some joy. Cause, hey, happiness is pretty good for you too- no matter where you are in the world.


[fblike]

Kristen Hubbard writerKristen Hubbard is a writer, wellness coach and Nutritional Therapy Practitioner. Her diverse background as a former CrossFit coach and correctional officer offer her a unique perspective on the world she sees, enabling her to reach individuals through her writing and coaching in a straight forward and approachable way


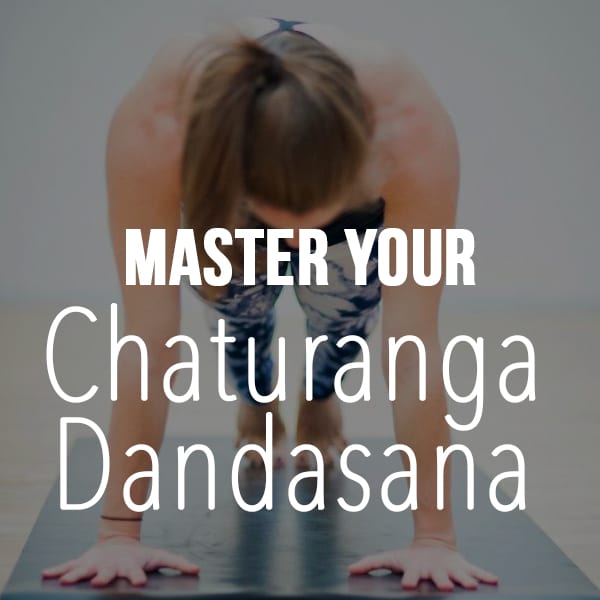
Master Your Chaturanga Dandasana

Lauren Rudick plank pose yoga academy internationalThis is a pose that I see so much misalignment in as an instructor. Chaturanga dandasana is a crucial element of practice for anyone who enjoys vinyasa yoga or wants to eventually achieve arm balances. Misaligned chaturanga can lead to shoulder strain and rotator cuff injuries as well as neck pain and low back pain. So it is important to do this asana properly. follow these 5 steps to master your chaturanga dandasana.
1) Starting in plank pose, make your body parallel to the mat. The shoulders should be stacked right on top of the wrists. The head is an extension of your long spine.

2) Engage the quadriceps by gluing the thigh muscles to their bones. Keep the body actively engaged by pressing the heels back toward an imaginary wall and the chest forward into space in front of you.

3) Push the ground away from you and slightly round the shoulders to turn on the shoulder girdle. The biceps will rotate in toward each other. The eyes of the elbows will face out.

4) Engage the bandhas! Mula bandha: lift your pelvic floor. Imagine there is a shelf between your legs. Lift that shelf toward the belly and the back. Uddiyana bandha: Scoop the belly button in and up in a J motion. Jalandara bandha: keep the back of the neck long. Tuck in the chin slightly. note: if your are having trouble keeping the hips lifted here and the back is starting to banana place the knees on the ground.

5) On an exhale bend the elbows. Keep everything engaged and active. The arms should come to a 90 degree angle. Hug the biceps in toward the body. Make sure the shoulder heads NEVER drop below the elbows this is crucial to ensuring safety and symmetry in the shoulder joint.

See if you can hold this pose for 1 breath, 3 breaths, 5 breaths… Keeping the bandhas working and the shoulders moving away from the ears. Once you can hold this asana for a few breaths comfortably, see if you can push back up to plank.
Can you do chaturanga pushups ??

Tag anyone who can benefit from improving their alignment in chaturanga dandasana! Happy shoulders and happy practice yogis!

[fblike]

Lauren Rudick 

Lead teacher and founder of Yoga Academy International, Lauren is a globally celebrated yoga instructor. She has been teaching yoga for nearly a decade and comes from a variety of lineages and traditions. Lauren’s appetite for yoga and travel are insatiable. She continues to study with world-class instructors whenever possible, all the while leading her own yoga retreats and workshops. Lauren has solid roots in Hatha yoga with continued studies in Vinyasa flow, Anusara, Ashtanga, Restorative and Yin Yoga. She is inspired by teachers who tell stories. She has studied under Seane Corn, Chris Chavez, MC Yogi, Susan Cohen, Nancy Goodfellow and many others. Lauren is passionate about sharing yoga from an authentic and soulful point of view. She believes that yoga practice can help uncover the veils that hide us from achieving our full potential.


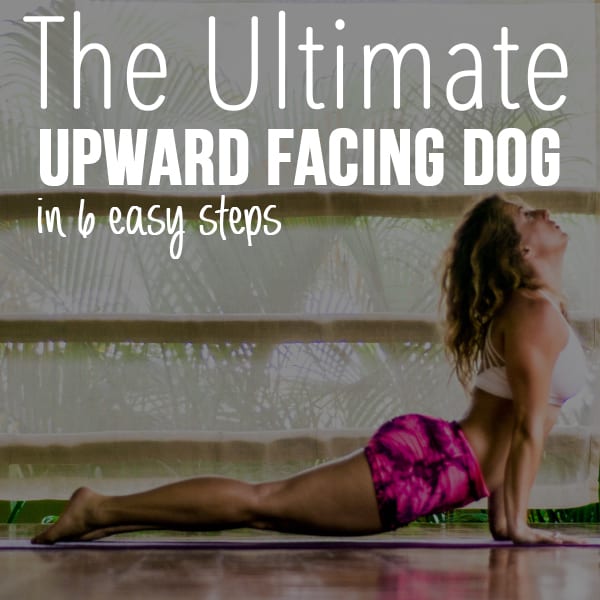
The Ultimate Upward Facing Dog: 6 Easy Steps

lauren rudick upward facing dog tutorialUrdva mukha svanasana a pose often rushed through or misaligned even by more experienced practitioners. Here are some things to remember while working towards your ultimate upward facing dog:
1) Push ten toe nails into the ground.

2) Firm the thighs. Think knee caps lifted by the strength of the thigh muscles.

3) Bandhas engaged. What does this mean? Imagine you’re wearing a pair of muscular underwear. Lift the front it. Pull it way up!! Engaging the lower abs and imagining there is a shelf between your legs and lifting that shelf up helps too.

4) Wrists under the shoulders then roll the shoulders back… Roll em back. Roll them back back back.

5) You can look up but don’t let the head flop back. Keep jalandhara bandha engaged by slightly tucking the chin, even if your head is up. For yoga newbies I wouldn’t suggest looking up at all, only forward. If the shoulder are up near your ears and you throw the head back there can be some serious damage to the neck. Wait until the rest of your updog alignment is spot on before looking up or back.

6) Open the heart! Have you ever seen a dog do this? It is like they are stretching new life into themselves. They press the chest open with their whole soul and you can practically feel the exuberance they emit in this stretch. Do that! Spread your collar bones and think about joy. With each upward facing dog, go to a place that makes you feel joyful! Breathe in and open your heart to the world.

if you have any questions or poses that you would like me to breakdown and write a post about, please mention it in the comment box below 🙂


[fblike]

Lauren Rudick 

Lead teacher and founder of Yoga Academy International, Lauren is a globally celebrated yoga instructor. She has been teaching yoga for nearly a decade and comes from a variety of lineages and traditions. Lauren’s appetite for yoga and travel are insatiable. She continues to study with world-class instructors whenever possible, all the while leading her own yoga retreats and workshops. Lauren has solid roots in Hatha yoga with continued studies in Vinyasa flow, Anusara, Ashtanga, Restorative and Yin Yoga. She is inspired by teachers who tell stories. She has studied under Seane Corn, Chris Chavez, MC Yogi, Susan Cohen, Nancy Goodfellow and many others. Lauren is passionate about sharing yoga from an authentic and soulful point of view. She believes that yoga practice can help uncover the veils that hide us from achieving our full potential.


I Am Not Flexible: Confessions of a Yoga Teacher

I am not flexible and I teach yoga. I used to feel like a complete sham, being a yoga teacher and not able to express full hanumanasana (the splits) …

Over time and with a lot of forgiveness, I have allowed this to become a strength rather than a hindrance. Due to an inability to demonstrate some poses in their fullest, I had been forced to improve my understanding of anatomy, my communication skills,
i am not flexible
and my explanations of postures. Comprehensible and down-to-earth analogies were needed in order to safely guide students in an out of complicated asana.
I had to let go of a tremendous amount of ego watching my students advance and surpass me in their bendtacular physical abilities. Rather than envy or jealousy, I was filled with enormous amounts of gratitude. It’s a truly humbling experience to watch your students surpass you. I felt privileged to be their teacher.
When my stiff body does manage a touch of suppleness, it becomes a fantastic victory. Years ago, while teaching gomukasana (cow face yoga pose), I was demonstrating how to position the arms when suddenly my fingertips grazed each other for the first time ever.
I almost stopped the class to shout, “Hey everybody! My fingernails just momentarily brushed each other!! Wooo hoo!! Did anyone see that!?!? I am usually not a flexible yoga teacher”
Which would have been both inappropriate and ridiculous in a room full of clasped hands behind backs.
But there’s something more here: When tickling fingertips together draws such awareness and excitement, suddenly little things in life offer us so much encouragement.
This small victory made me feel like I could accomplish anything! The intense sensation of joy and triumph in that moment gave me so much empowerment.
Once I had let go of the goal-oriented nature of my practice and the negativity I had let myself experience for being Inflexible, my personal asana practice flourished.
… 
i am not flexible
Today my yoga practice is about joy. It is about love. It is so much less about the asana. When I step on my mat, I close my eyes and I move my soul with breath and posture. I let my heart pour out on the rubber floor. Whatever I am feeling I just let it be.

I have become so much more compassionate and forgiving of myself on the mat that it has permeated other areas of my life too-less judgment, more being okay with others as they are. By allowing expression and removing rigidity from my personal yoga practice, my body has opened up as well.
 …
Today, not only can I do the splits, but lotus, arm balances, fallen angel, full dancer, have all become part of my regular practice. Oh, and gomukasana too! I can totally grab my hands and even reverse prayer these days! I never in my life thought I would be able to express these asana!
 …
For anyone who is not a flexible yoga teacher or student, step on your mat. Close your eyes. Take some deep breaths. Ask yourself, “what is possible?” You might be surprised with the results, I know I was!

[fblike]

Lauren Rudick

Lauren Rudick
 
Lead teacher and founder of Yoga Academy International, Lauren is a globally celebrated yoga instructor. She has been teaching yoga for nearly a decade and comes from a variety of lineages and traditions. Lauren’s appetite for yoga and travel are insatiable. She continues to study with world-class instructors whenever possible, all the while leading her own yoga retreats and workshops. Lauren has solid roots in Hatha yoga with continued studies in Vinyasa flow, Anusara, Ashtanga, Restorative and Yin Yoga. She is inspired by teachers who tell stories. She has studied under Seane Corn, Chris Chavez, MC Yogi, Susan Cohen, Nancy Goodfellow and many others. Lauren is passionate about sharing yoga from an authentic and soulful point of view. She believes that yoga practice can help uncover the veils that hide us from achieving our full potential.