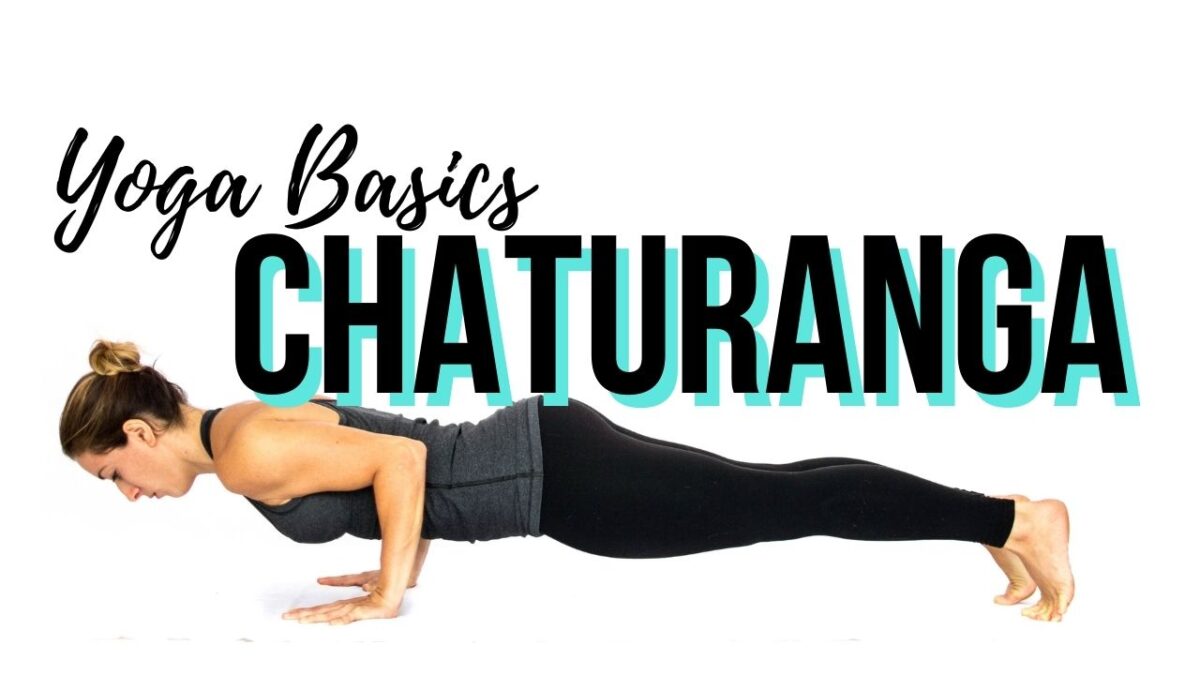
Yoga Basics: Chaturanga Dandasana

Often the healing properties of yoga are emphasized. Yes, yoga can be incredibly therapeutic! But just like any movement modality, if we are not careful we can injure ourselves. Knowing how to do chaturanga dandasana safely can insure the longevity of your yoga practice. That’s what we want right? A safe sustainable practice for the long term. So check out the video above and learn how you can do chaturanga dandasana the right way for your body.

Yoga Basics: Chaturanga Dandasana

In Sanskrit this pose translates to Four Limb Stick Pose. Chatura is the number 4. Anga is a limb, like the branch of a tree, Danda is a stick or a staff and Asana means posture. 

This pose is SO often misaligned in vinyasa classes but no one ever corrects their students!

Why is it important to know how to do chaturanga dandasana? Because if you frequently misalign this pose you can create long lasting shoulder injuries. Here’s Lauren Rudick takes you through how to do this pose safely.

Often the healing properties of yoga are emphasized. Yes, yoga can be incredibly therapeutic! But just like any movement modality, if we are not careful we can injure ourselves. Knowing how to do chaturanga dandasana safely can insure the longevity of your yoga practice. That’s what we want right? A safe sustainable practice for the long term. So check out the video above and learn how you can do chaturanga dandasana the right way for your body. 

Train with us:

200hr yoga
teacher training

The perfecti foundation to becoming a professional yoga teacher. 

300hr yoga
teacher training

Advance your teaching career and gain additional certifications. We offer modules in Yin Yoga, Kids Yoga, Acro Yoga, Chakra-Vinyasa Yoga, Ashtanga Yoga, Tantra Yoga and more! Available in person and online. 

questions for us? 
Get in touch now!

Yoga Basics: Utkatasana

Yoga Basics: Fierce Pose

Utkatasana

Fierce pose or chair pose is a great standing posture that can be included in to almost ANY yoga sequence !

It strengthens the legs and arms, tones the quads and heats up the body!

In the video below, Yoga Academy International founder Lauren Rudick takes you step by step through fierce pose

This pose is also therapeutic for flat feat, can help build stamina AND boost confidence. 

Be careful in this pose if you have ankle, knee, hip or groin injuries. Remember, always consult with a doctor before taking on a new exercise regimen. 

Want more?

Get the Yoga Academy International experience LIVE in your own home!

Times are changing and many yogis are seeking virtual classes. At Yoga Academy International’s virtual studio you can join our morning flows right from our gorgeous teacher training locations, practice with our expert teachers and take classes with our outstanding graduates. 

levels icon

Class level 
(1-3)

stretch icon

Stretchy

strengthening icon

Strengthening

heating icon

Heating

cooling icon

Cooling

Missed your LIVE class? Don’t worry! The class will be e-mailed to you when it’s over and you will have access to it for 24hrs. 

Train with us in person...

200hr yoga
teacher training

in playa maderas
Taking place on the spectacular cliffs of Maderas Beach, this 200hr Yoga-Alliance Registered Teacher Training is the perfect foundation for becoming a professional yoga teacher.

Ashtanga Yoga intensive

in Lembongnan, Bali
THIS is an amazing course with KPJAY Authorized level 2 teacher Tina Bock! Tina has spent years studying in Mysore, India under Sharath Jois and takes a very traditional but fun approach to Ashtanga Yoga. This program is an ELECTIVE MODULES THAT MAKES UP OUR ADVANCED 300HR YOGA TEACHING CERTIFICATION.

questions for us? 
Get in touch now!

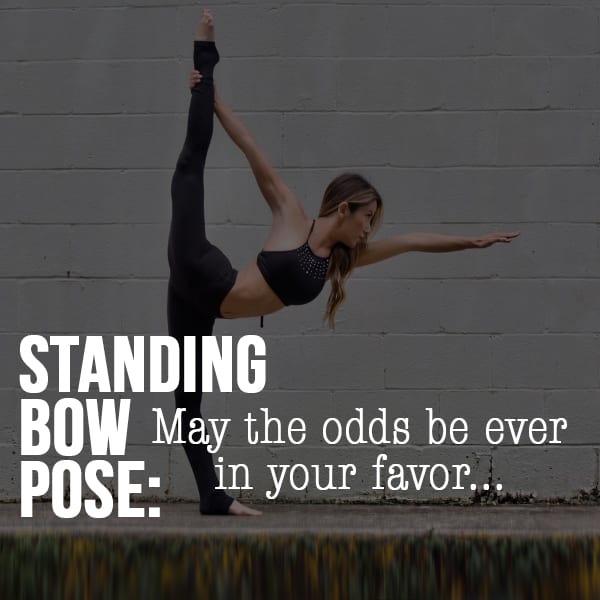
Standing Bow: May this pose be ever in your favor…

Standing Bow Pose: How to up your (Hunger) game! May this posture be ever in your favor….

standing bow pose, side view, woman


You’ve seen it.  It’s the quintessential yoga pose.  On every mountaintop, beach, and natural wonder of the world, someone has now done a #stopdropyoga and you can bet your bottom dollar that this is one of the most popular choices in the modern yogi’s repertoire.  And who can blame them? From beginner yogi to decorated veteran yogi, nobody can deny the beauty and grace exuded in a posture that creates the shape of a bow and arrow -equal parts strength and grace.  But how useful is a bow and arrow that isn’t aimed straight or even one that isn’t pulled tight? Don’t know what i’m talking about then ask Katniss Everdeen (from the blockbuster movie The Hunger Games).  It wasn’t her beauty or grace that helped her survive the Hunger Games, but rather her bulldog determination to precision, accuracy, and focus, that gave her the upper hand in the biggest fight for her life.  Now that sounds pretty dramatic, but this posture was meant to exemplify the intense focus of this primitive sport.  And, and as beautiful as this posture may be, if you practice humility and honesty in your daily practice this posture tends to serve up a large helping of “humble pie”.  If you go beyond the impressive shape of this posture, it not only takes dedication to alignment but also learning which intricate muscles to relax and which to contract to hit the bullseye of the mental and physical benefits.

The secrets to this posture are found in this precision based sport, so let’s go there for our cues.  I will explain this posture on the right side for sanity’s sake so that I can explain using “right” and “left” cues, but this posture can obviously be done on both sides.

  1. Stance and set up: Stand up straight.  Keeping the right elbow touching your waist and bend your arm 90 degrees keeping your palm facing up.  Keeping the knees together begin to bend your right knee drawing your heel toward your Gluteus muscle.  Still keeping the knees together, reach and grab for the right ankle at the inside of the ankle (right where the knobby bone of the ankle protrudes).  Extend the left hand up drawing the left Bicep by the left ear.  Left palm should be facing forward.  Begin to inhale, and you reach your left hand higher as if you are going to touch the ceiling, shoulder coming out of the body.  The whole body should feel extended and pulled tight.
  2. Grip: Keep all 5 fingers of the right hand together (including the thumb).  Grip should be strong but no break in the wrist.  Although the grip is tight (white knuckled), make sure that as you begin to kick back that you do not begin to pull with the strength of the right arm, the bow is drawn with the kick.
  3. Place the arrow on the bow: In this posture, the arrow is formed with the two arms.  The bow is formed with the kicking leg.  Thus, it is important that the force comes with the kick (kicking is hard and continuous).  As you begin to kick back and away from the body, you form the bow and you are also placing the arrow on the bow simultaneously.  As you begin to kick back, the arms begin to be pulled into one line, from the left fingertips all the way to the right hand grip.  You are working on getting the arms in one line so the shoulders will also be pulled in to one line through the force of the kick.  Eventually, the chin will be touching the left shoulder because you have never changed the position of the head but because the shoulders are pulled in one line (from the reaching and kicking actions), then the left shoulder will keep moving to align with the chin (the midline of the body) -not the other way around.  In other words, you are reaching so much with the left fingertips that the left shoulder eventually meets the chin, not the chin reaching  for the shoulder.
  4. Finger position: Just as all 5 fingers of the right hand are together and touching, same goes for the fingers of the left hand.  They are together and the palm is facing forward and rotates down as the body comes down.  Also, when looking in the mirror in front of you, the fingertips of the left hand should appear as if they are touching the iris of the left eye; the hand position is much higher than many realize.  This helps you keep as arch in the spine and initiates the backbend.
  5. Draw:  As I mentioned earlier, the kick is continuous.  You need to draw a bow tight in order to shoot an arrow, right?  Imagine what would happen if you released the tension in a bow and arrow and then tried to shoot an arrow… the arrow would flop to the ground no matter how good you may be.  Same goes for this posture.  Keep kicking!  Only when you feel that your kick is maximized and you can’t kick any harder, do you even think about rotating the body at all.  I often see people begin to let the belly rotate down when there is still some slack in the bow and this is a recipe for misalignment and a wobbly bow and arrow.
  6. Aim:  In this posture, everything will eventually line up in one straight line in the front mirror.  Look at the picture (below).  You will see two feet in one line.  Not only that, but you will also, see my chin, left fingertips, gaze, everything in one line as if I am standing between two panes of glass.  The only thing that should not be in one line from the front are the hips.  The hips should be square to the ground, so there also needs to be a continuous effort to pull the right hip down.  This creates a twist in the spine.  See how everything is in one line in the picture, below? Except, my hips look like the are next to each other on either side of my body?  That is the correct alignment.  I often see people opening their right hip to achieve an kick that appears higher, but are really just trading alignment for pseudo-depth.  As you rotate your body down, you should rotate as if you are on an axis and there should be no side to side motion.  Keep coming down until the belly button is facing the ground (while never letting up on the kick).  Hold steady, breathe normally, and keep your eyes focused on your left fingertips touching your left eye in the mirror.
  7. Release:  When you are ready to come out, use your inhale to lift yourself back up the same axis from which you rotated down -reversing out the exact same way you came down.  Never let your left fingertips come away from touching your left eye win the front mirror.  End in the same position you began your set up.

standing bow pose, woman, front view

So, go ahead now.  Channel your inner Katness, and may this pose be ever in your favor!

Namaste, Bendy Babes,

Xoxo,

Paloma


woman, standing, smiling, field

Paloma

Paloma is an avid yoga enthusiast, practitioner, and teacher in Louisville, Kentucky.  She created Her Bendy Life as a way to expand on her passion for all things yoga.  She has found that yoga is a very personal journey and she wanted a create a space to share some of the experiences, tips, and tricks from her dedication to her ever evolving practice.  She received a 200-RYT certified from Cindy Lunsford in Hot Vinyasa Yoga and also traveled to Cabo San Lucas to train with Tony Sanchez in the Ghosh Lineage. Paloma took her practice to new heights in 2016 when she placed 1st in the Yoga Federation’s Regional Competition in Chicago Illinois and 9th in the 2016 National Yoga Championship.

Paloma’s teaching emphasizes using the planes of the body to achieve proper alignment, allowing students to achieve the full therapeutic benefits of yoga.  She believes in adapting postures to each students ability (whether beginner or advanced) while maintaining physical alignment.  Paloma believes that yoga should never be dogmatic and that students should only go as far into a posture as what is comfortable for them.  She helps students find modifications that help them safely progress. Paloma lives with her husband George, her Labrador Retriever Belle, and her Pug Piper.

Instagram: @her_bendy_life

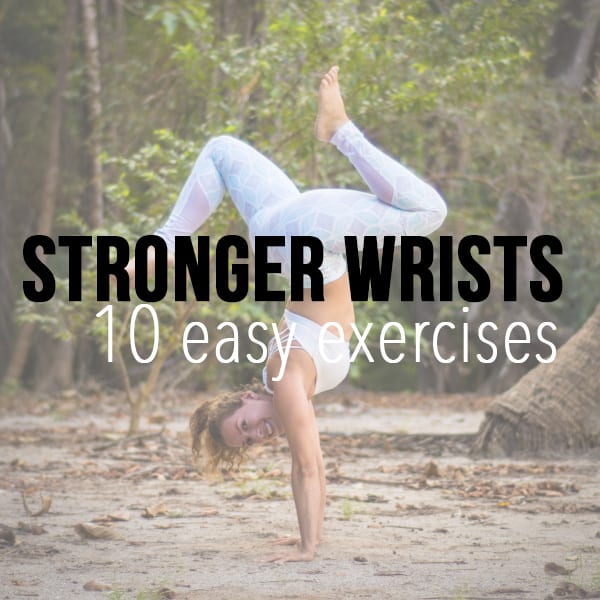
Stronger Wrists: 10 Easy Exercises

There’s a reason that the statement “getting down on hands and knees” is synonymous with doing all of the hard things. As with most clichéd statements, the words themselves may be overused, but their validity rings true. I’d make a joke about having a nickel for every time I saw a student come down and shake out his or her wrists mid-downward dog, but I think it’s time to lay to bed the literary devices (for now).

As a mammalian group that has evolved to carry out the majority of our lives on two feet as opposed to quadruped, the struggle gets very real when we are tasked with bearing significant load on the wrists. The struggle is further amplified when said wrist joints are supporting weight at a degree of flexion or extension that they so rarely get exposed to from our tech-absorbed lifestyles (re: texting, typing, and any other social media-induced sinning you can think of). The solution to the tenderness or lack of strength you may be feeling is not to simply keep pushing through chaturanga after chaturanga, letting your wrist weakness translate its way up into pinching scapula and over-extension of the lumbar spine. Scale back, and start with a basic wrist warm-up routine that you can build up over time to help develop both the strength and mobility you need to keep this integral synovial joint happy and healthy. Keep in mind that none of these exercises are revolutionary or unique (trademark anyone?), but serve to introduce a less familiar range of motion back into the joint, coupled with dynamic movement. Here are 10 easy exercises for stronger wrists.

. . . . . . . . . .

1) Table-top Dynamic Palm Presses

stronger wrists

Start by positioning yourself on hands and knees; knees under your hips, and with wrists under shoulders. Wrists will not line up right underneath your shoulders, as you will have to allow for the carrying angle of the elbow, so you will notice slight ulnar deviation (fingers moving away from midline). Wrist creases will move towards parallel with the top of the mat. Spread all ten fingers wide, maintain a gentle curve through the joints of the fingers, and distribute your weight evenly by pressing in through the base of your palm (meaty party), as well as the pads of your fingers. Start moving back and forth, use your inhalations to take your hips towards your forearms, and your sitting bones back towards your heels. Make sure you’re not dropping your navel towards your mat; front line of your body remains engaged, but not tense. You can switch it up and move side to side, just be sure to keep the fingers spread wide, and the shoulder blades moving in opposite directions to avoid any pinching of the scapula.


2) Table-top Dynamic Wrist Extensions (Variation A)

stronger wrists

Take the same starting position as 1). Turn your fingers out to opposite edges of your mat (thumbs forward, pinky fingers back). Move hips forwards and then sit weight back towards heels, keeping all ten fingers pressing in to the mat. Play with changing the weight distribution through your palms, and move through 10-20 iterations of this.


3) Table-top Dynamic Wrist Extensions (Variation B)

Take the same starting position as 2). Instead of moving the trunk and hips, lift one palm, suction cupping the palm diaphragm up away from your mat, and then place it back down. Repeat on other side, and feel free to lean weight slightly toward each side as your lift the palm. Repeat 10-20 times per side.

stronger wrists stronger wrists


4) Table-top Reverse Wrist Extensions with Pulsing

stronger wrists

Users’ warning: this is intense, especially for those of us restricted to a stereotypical office job where we spend the vast majority of our time typing, in wrist flexion. Take palms onto the mat, but spin wrist creases to face towards the front edge of your mat, fingers point directly back toward your knees. Walk your knees up to meet your finger tips to take some pressure and weight off of your wrists, and start to slowly bend your elbows slightly, taking your glutes back toward your heels, and lifting the palms away from the ground. If this is super intense, try a single palm variation, with one wrist crease exposed to the front of your mat, and one wrist crease facing back in toward your knee. Keep this exercises dynamic by pulsing the palms up and down 5-10 times, and on your last pulse, see if you’re able to peel the palm slightly higher, and hold for 3-5 rounds of breath.


5) Moving combo (2-4)

Stay in table-top, and move through the different wrist positions explored in the first four exercises, using your inhales to guide weight forwards, and your exhales to bring your glutes closer towards your heels. This requires some coordination, but is a dynamic way to work mobility through the wrist joint and challenge your breath-body connection.


6) Table-top, “Awkward” Push-ups

Stay in table-top, this time reverse the direction of your fingers from 2) and 3), so that your elbows point out, thumbs come toward your knees, and pinky fingers point forward. Keeping your shoulder blades spreading apart, upper back strong, inhale, then exhale to bend at your elbows in an “awkward” push-up variation, and press back up to straight arms on the inhale. Make sure your core braces to prevent your chest from collapsing down, and keep your neck in line with your spine. Repeat this 10-15 times.

stronger wrists stronger wrists stronger wrists


7) Table-top Finger-Curls with Wrist Flexion

Now we’re getting to the good stuff! Maintaining table-top position, flip onto the backs of your palms (yes, that’s right. No, I’m not crazy, and yes, this is going to feel weird). Wrist creases will face out toward the left and right side of your mat, with your fingers spread wide apart and facing in towards one another. The soft, fleshy part of your palms (diaphragm), will face up towards your nose. Take an inhale to spread the fingers as wide as you can, and then exhale to curl the fingers into fists, squeezing. Repeat this 5-10 times, without compensating or taking tension in through your neck and shoulders.

stronger wrists stronger wrists


8) Table-top Dynamic/Sustained Wrist Flexion

stronger wrists

Same starting position (backs of palms) as 7). Take your wrist creases to face towards the front edge of your mat, and try to press as much of the back of your hand into the mat as you can. Hold here. Keep your elbows from bending, and spread your fingers far apart. You can play with spreading the fingers wide, and then squeezing them back together, in a snow-angel motion, to change the sensation through the wrist and back of your palms.


9) Isolated Finger Taps

Quadruped starting position, spread all ten fingers wide. Keep elbows from bending, and start to tap just the thumb on both left and right hands. Take 20 taps, then move to index finger. Move through all five fingers on each hand. You’ll find this gets significantly tougher when you move to the middle, ring, and pinky fingers due to the structure and attachment of the tendons in your hands.


10) Non-load Bearing Flexion/Extension of Wrists

Sit in kneeling, or any comfortable seated position. LiFt elbows to shoulder height. Inhale here, on exhale squeeze hands into fists, knuckles face towards center of room, inhale to release your hands open, extending the wrists and flexing fingers back in towards your face. Repeat 5-10 times. Move slowly, squeeze a little more tightly each time you take fists, and spread all ten fingers wide when you extend and open the palms.

. . . . . . . . . .

Pace yourself; start by spending around five minutes in total working through exercises 1) to 5) as your foundation. As you start to build stability, strength, and feel less strain or resistance, gradually add in 5) to 9), mixing and matching so that you are working in equal parts wrist extension (palm diaphragms DOWN) and wrist flexion (palm diaphragms UP). Most importantly, don’t be afraid to freestyle it. The more comfortable and confident in your wrist mobility you become, the easier you’ll find it becomes to explore modifications and creative additions to your wrist warm-up sequence that challenge your anatomical limitations. It may not be as sexy as a vinyasa or a bad-ass arm balance, but by building from the ground up, you’re developing a better understanding of your body as its own entity, and setting the foundation to move towards complex, challenging movements further down the road. So get down on your hands and knees, and work your stronger wrists.

[fblike]

Cassandra Cooper writerCASSANDRA COOPER

GROWING UP WITH A BACKGROUND IN COMPETITIVE FIGURE SKATING, CASS’ JOURNEY WITH YOGA BEGAN AT A YOUNG AGE. WHAT STARTED AS A WAY OF MAINTAINING FLEXIBILITY AND MOBILITY HAS SINCE SHIFTED TO FOCUS ON BUILDING STRENGTH, BY COMBINING ELEMENTS OF FUNCTIONAL MOVEMENT INTO HER PRACTICE AND SEQUENCING, HELPING TO EXPLORE THE DIFFERENT WAYS IN WHICH EACH INDIVIDUAL’S BODY MOVES AND CHANGES SHAPE. SINCE COMPLETING OCTOPUS GARDEN’S 200 HOUR TEACHER TRAINING, AND RISHIKESH YOG PEETH’S 300 HOUR ADVANCED TEACHER TRAINING PROGRAM, CASS HAS PURSUED BARRE AND PILATES CERTIFICATIONS THROUGH STOTT PILATES, ALONG WITH ESSENTRICS MOVEMENT TRAINING. THE MOST IMPORTANT THING SHE’S DISCOVERED ALONG THE WAY IS THAT YOU’RE ALWAYS A STUDENT – BE CURIOUS, ALWAYS QUESTION, CAREFULLY ANALYZE, AND CONTINUOUSLY SEEK NEW AVENUES TOWARDS UNEXPECTED ANSWERS. ‘YOGA IS THE JOURNEY FROM COSMETIC TO COSMIC BEAUTY.’

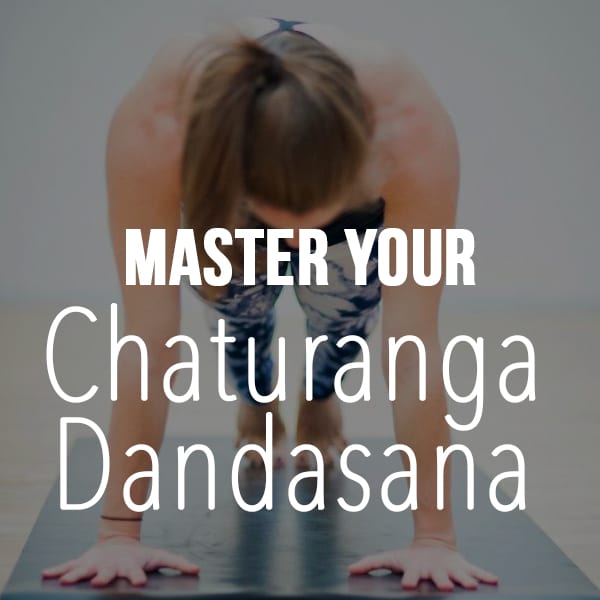
Master Your Chaturanga Dandasana

Lauren Rudick plank pose yoga academy internationalThis is a pose that I see so much misalignment in as an instructor. Chaturanga dandasana is a crucial element of practice for anyone who enjoys vinyasa yoga or wants to eventually achieve arm balances. Misaligned chaturanga can lead to shoulder strain and rotator cuff injuries as well as neck pain and low back pain. So it is important to do this asana properly. follow these 5 steps to master your chaturanga dandasana.
1) Starting in plank pose, make your body parallel to the mat. The shoulders should be stacked right on top of the wrists. The head is an extension of your long spine.

2) Engage the quadriceps by gluing the thigh muscles to their bones. Keep the body actively engaged by pressing the heels back toward an imaginary wall and the chest forward into space in front of you.

3) Push the ground away from you and slightly round the shoulders to turn on the shoulder girdle. The biceps will rotate in toward each other. The eyes of the elbows will face out.

4) Engage the bandhas! Mula bandha: lift your pelvic floor. Imagine there is a shelf between your legs. Lift that shelf toward the belly and the back. Uddiyana bandha: Scoop the belly button in and up in a J motion. Jalandara bandha: keep the back of the neck long. Tuck in the chin slightly. note: if your are having trouble keeping the hips lifted here and the back is starting to banana place the knees on the ground.

5) On an exhale bend the elbows. Keep everything engaged and active. The arms should come to a 90 degree angle. Hug the biceps in toward the body. Make sure the shoulder heads NEVER drop below the elbows this is crucial to ensuring safety and symmetry in the shoulder joint.

See if you can hold this pose for 1 breath, 3 breaths, 5 breaths… Keeping the bandhas working and the shoulders moving away from the ears. Once you can hold this asana for a few breaths comfortably, see if you can push back up to plank.
Can you do chaturanga pushups ??

Tag anyone who can benefit from improving their alignment in chaturanga dandasana! Happy shoulders and happy practice yogis!

[fblike]

Lauren Rudick 

Lead teacher and founder of Yoga Academy International, Lauren is a globally celebrated yoga instructor. She has been teaching yoga for nearly a decade and comes from a variety of lineages and traditions. Lauren’s appetite for yoga and travel are insatiable. She continues to study with world-class instructors whenever possible, all the while leading her own yoga retreats and workshops. Lauren has solid roots in Hatha yoga with continued studies in Vinyasa flow, Anusara, Ashtanga, Restorative and Yin Yoga. She is inspired by teachers who tell stories. She has studied under Seane Corn, Chris Chavez, MC Yogi, Susan Cohen, Nancy Goodfellow and many others. Lauren is passionate about sharing yoga from an authentic and soulful point of view. She believes that yoga practice can help uncover the veils that hide us from achieving our full potential.